How to manage users
A new vStack Center account is empty: creation adds a record with a name, but without a password or any roles. The user cannot work with this account: they have no password to sign in with, and even if they sign in, they cannot see any objects. Setting up the account fully takes three actions: create the account, set a password, and assign a role in the required VDC (virtual data center).
A second practical point: user management is reserved for one role.
Cluster master can perform all operations; everyone else receives -403
"Access denied". There are two exceptions: users can change their own passwords
and their own interface settings.
Prerequisites
- The
Cluster masterrole for all operations except changing your own password and interface settings. - A name for the new account: 4 to 41 characters, using only Latin letters,
_, and-. The name cannot contain digits. - A password that meets the cluster's password policy. The current requirements
are shown in the
Settingssection, in theSecurity policyblock — see How to configure sign-in and manage sessions. - The VDC in which the user needs a role, and the role itself, from the list on
the
Rolestab.
Step 1. Review existing users
-
Open
Provider Data Center→Users & Roles. -
Go to the
Userstab. The table has theName,Status,Full Name,Created, andChangedcolumns;Statusshows the account's state.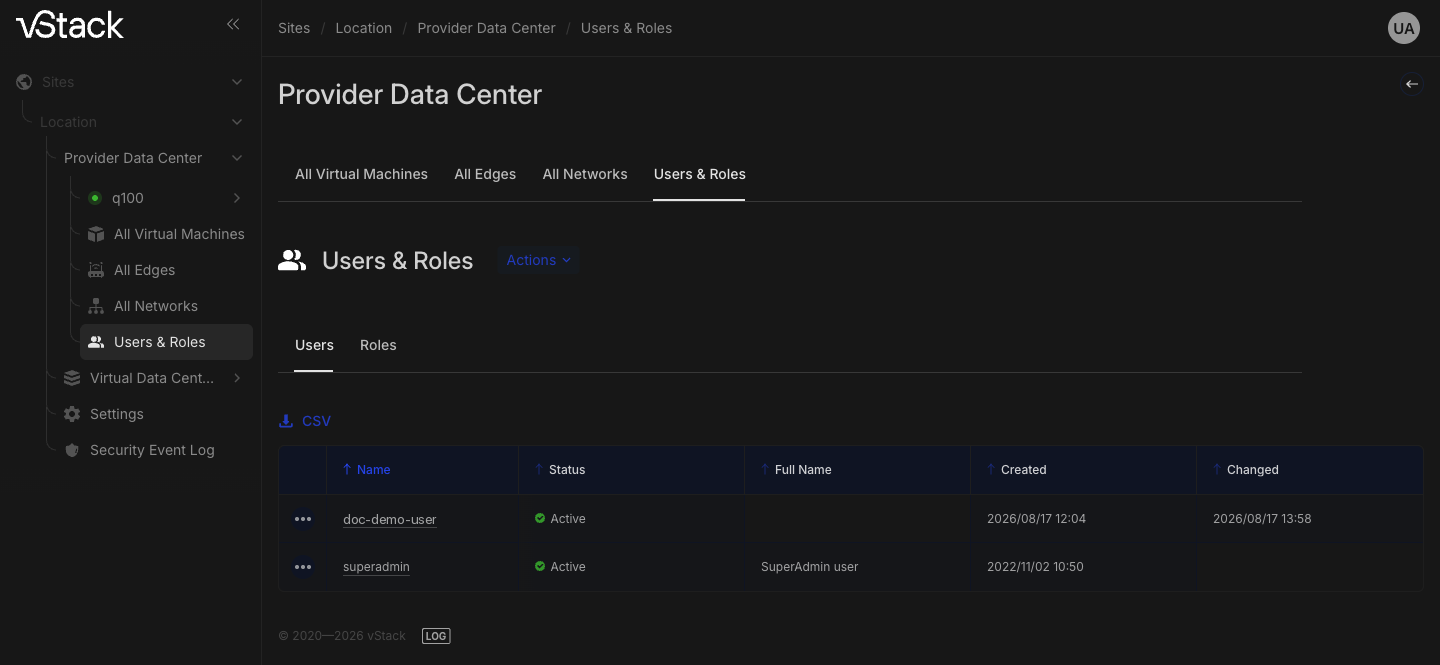
-
Use the
Search in tablefield to narrow a long list, theCSVbutton to export the entire list, and the pagination controls below the table to open other pages.
The list shows only active accounts: deactivated accounts do not appear in it.
Step 2. Create an account
-
On the
Userstab, clickActionsand selectCreate user. -
Enter the account name: 4 to 41 characters, using Latin letters,
_, and-. The name must be unique within the cluster. -
Enter a full name if needed: this is a human-readable label, and the field is optional.
-
Confirm creation and verify that the account appears in the
Userstable.
The new account has no password; set it separately in the next step. Account creation also enables the requirement to change the password at first sign-in, so the first password will be temporary.
Step 3. Set a password
Users can change their own passwords without cluster administrator permissions.
Cluster master sets the password for another account: open the account in the
Users & Roles section and set a new password.
The password is checked twice. First, its characters are checked: a password cannot contain spaces. It is then checked against the cluster's password policy: minimum length, uppercase and lowercase letters, a digit, and a special character. One additional requirement always applies: the password must not match the account name. When users change their own passwords, the new password must differ from the current one. Passwords belonging to different accounts are not compared.
Changing the password revokes previous access: all previously issued sessions for the user are invalidated. A user working in the interface at that moment is redirected to the sign-in form.
A password set by an administrator for another account is temporary. At the next sign-in, the user is taken to the password change form, and all other sections remain inaccessible until the password is changed. The user has 5 minutes to change it. Notify the user in advance. What they see at sign-in is explained in Mandatory password change at first sign-in.
Step 4. Assign a role
Permissions become available only after a role is assigned, and the role applies
within a VDC rather than without a scope. Open the account in the Users & Roles
section, add a role, and specify the VDC in which it applies.
Verify the result in the same place: the account lists its roles together with their VDCs. For details on roles, scopes, and removing a role, see How to configure roles and privileges.
How to unlock an account
The cluster automatically locks an account when failed sign-in attempts reach the
policy limit. The account's state in the Users list indicates the lockout. If
the policy's lockout duration is zero, the lockout never expires and must be
removed manually.
Open the locked account in the Users & Roles section and unlock it. This also
resets the failed attempt counter and the time of the first failed attempt. The
password does not change: if the user has forgotten it, unlocking the account is
not enough; step 3 is required.
How to restrict where a user signs in from
You can define an allowlist of networks in CIDR format for an account; sign-in is then permitted only from addresses in the listed networks. The list is maintained in the account itself: networks are added and removed one at a time.
IPv4 subnets with masks from 8 to 32 (192.0.2.0/24) and IPv6 subnets with
prefixes from 16 to 128 (2001:db8::/32) are accepted. A network already in the
list cannot be added again.
The allowed vhost list works the same way: a vhost name is a string of 5 to 512 characters.
How to deactivate an account
Deactivation removes the account from the Users list and clears its associated
data. Open the account in the Users & Roles section and delete it.
Built-in cluster accounts, with identifiers below 10, cannot be deactivated: the platform rejects the operation with "Build-it users removal prohibited". The same rule applies to role assignments for built-in accounts.
Personal interface settings
Some interface settings, such as the selected theme, are stored in the account itself rather than in the browser. They therefore follow the user: a setting configured on one workstation also applies when the user signs in from another. Settings for different users are independent.
If an operation is rejected
| Code | Reason | What to do |
|---|---|---|
-403 "Access denied" | the role lacks user management permissions | perform the operation as Cluster master; view your roles in the Users & Roles section |
-22505 "Bad name param value" | the name contains digits, spaces, or other invalid characters, or its length is outside 4–41 characters | use Latin letters, _, and -, and keep the length within 4–41 characters |
-22516 "User with name '<name>' exists already" | the name is already used by another account | choose another name |
-22515 "Failed to add an user" | the account was not created in the database | retry; if retrying does not help, check the cluster's state |
-22803, -22804, -22805 | the account was not identified: the request was sent without an identifier | return to the Users tab and reopen the account |
-22606, -22720, -22906 "Specified user was not found" | the account no longer exists or has already been deactivated | refresh the Users list |
-22610 "Build-it users removal prohibited" | an attempt to deactivate a built-in account with an identifier below 10 | built-in accounts cannot be deleted; create a separate user |
-22320 | a role assignment for a built-in account, or the role is already assigned | use a regular account; view its current assignments in the account itself |
-22712 "Bad password" | the password contains a space | remove whitespace characters |
-22730…-22735, -22737 | the password does not meet the password policy | view the current requirements in Settings → Security policy |
-24713 "remote param has mask out of range 8..32" | the IPv4 mask is outside 8–32 or the IPv6 prefix is outside 16–128 | use a mask within the allowed range |
-24712, -24715 | the value cannot be parsed as a CIDR subnet | specify a subnet such as 192.0.2.0/24 or 2001:db8::/32 |
-24714 | the user already has this network | check the account's network list |
-24812 "vhost param has bad length" | the vhost name is shorter than 5 or longer than 512 characters | use a length within the allowed range |
-29030, -39030 "No user with ID==<uid>" | the session refers to a deleted account | sign in again as an existing user |
See also
- Roles, privileges, and scopes — vStack Center access model.
- Building a custom role and assigning it in a VDC — How to configure roles and privileges.
- Password policy, lockout, and session termination — How to configure sign-in and manage sessions.
- Complete field sets and a summary of error codes — Fields and error codes for access methods.
API methods
API operations covered on this page: user-list, user-get, user-create,
user-set-password, user-unlock, user-role-assign, user-roles-map,
user-remote-list, user-remote-add, user-remote-delete, user-vhost-list,
user-vhost-add, user-vhost-delete, user-delete, user-params-get,
user-params-set — see the API reference.