How to prepare a Windows VM for conversion to an image
When to use
Before you convert a Windows VM into an image. Every machine created from the image must get its own Windows identity (the security identifier SID, the computer name) and go through first-boot setup: host name, administrator password, network.
In vStack Center, first-boot setup of a Windows machine is done by Cloudbase-Init. When a VM is created, the cluster prepares a disk with its parameters in the OpenStack ConfigDrive format, and Cloudbase-Init reads it on the first boot. For this to work on a copy, the source machine is generalized with the sysprep utility: it erases the Windows identity, and on the next boot Windows goes through setup again and starts Cloudbase-Init.
Conversion into an image is irreversible, and after sysprep the source machine must not be started. That is why the order of the steps below matters.
Prerequisites
- The VM was created from a Windows catalog image with Cloudbase-Init — the image guest customization type is «Cloud-base». An image converted from a VM inherits this type from the VM profile.
- Everything that should go into the image is installed and configured inside the guest.
- You have Windows administrator access to the VM — through the console or RDP.
- The VM meets the conversion requirements: only the boot disk, no clones, not a thin clone itself — see the prerequisites.
Steps
-
Remove secrets from the guest. Delete saved passwords, keys, tokens, history, and user files that must not end up in the copies. Whatever stays on the disk is received by every machine from the image, and for an image shared across the cluster — by every VDC.
-
Take a VM snapshot. Stop the machine, take a snapshot, and start it again. The snapshot is a rollback point if sysprep fails or the VM boots by accident after it. Conversion deletes all VM snapshots anyway. A snapshot of a running machine also works, but after a rollback to it Windows shows the «Shutdown Event Tracker» window: close it with «Cancel» before you go on.
-
Switch the Cloudbase-Init service to manual start. In Server Manager, open the «Tools» menu and select «Services».
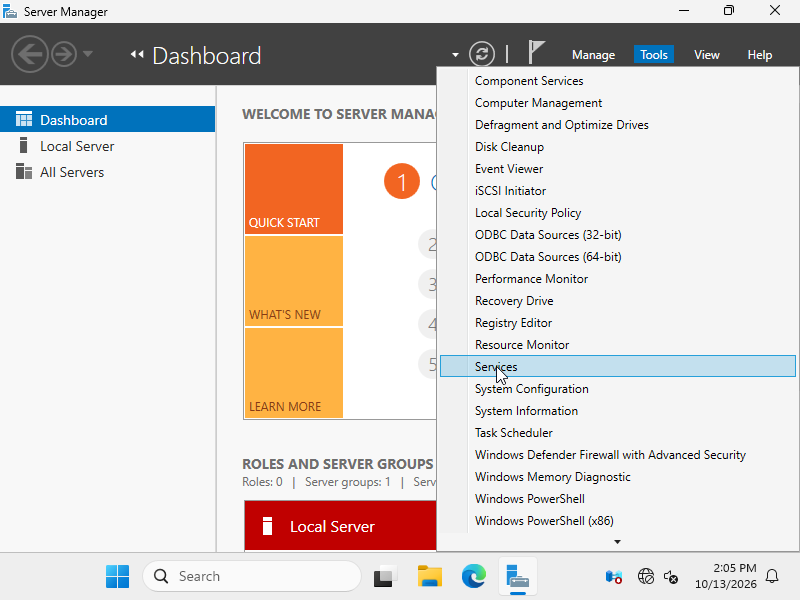
In the service list, find
cloudbase-initand double-click it to open its properties. In «Startup type», select «Manual» and click «OK». The service list then shows «Manual» for it.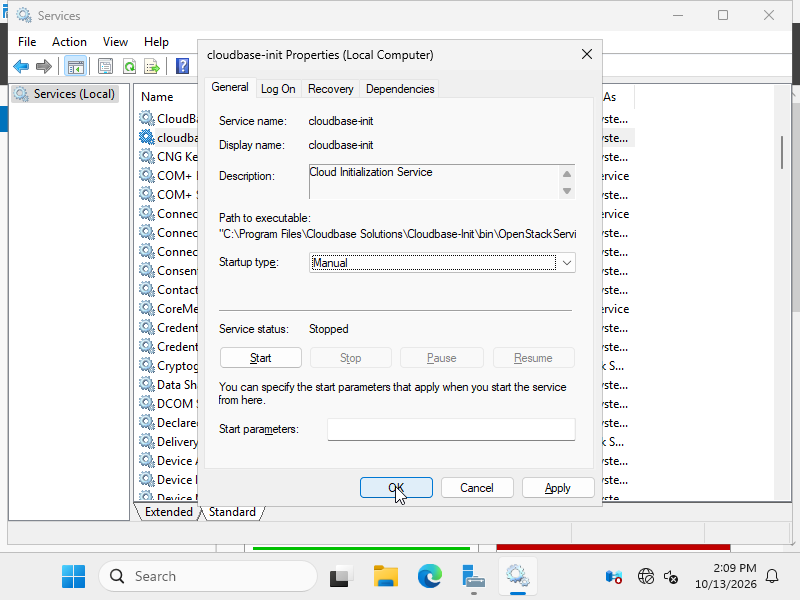
Why: if the service stays on automatic start, on a copy it starts before Windows finishes setup and reboots the machine. The copy ends up in the «The computer restarted unexpectedly or encountered an unexpected error» error and does not boot.
-
Check that the service comes back on in the copy. This is done by the
SetupComplete.cmdscript, which Windows runs at the end of the copy's setup. In File Explorer, openC:\Windows\Setup\Scripts, right-click theSetupCompletefile, and select «Edit». The file opens in Notepad and must contain the linesc config cloudbase-init start= auto && net start cloudbase-init.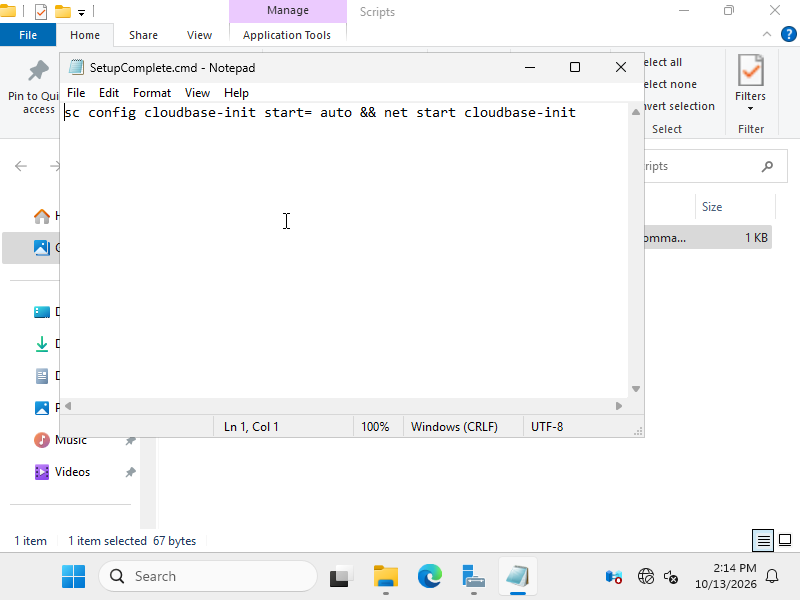
If the file is missing, create it in Notepad with this line and save it as
C:\Windows\Setup\Scripts\SetupComplete.cmd. -
Copy the Cloudbase-Init answer file to the root of drive C. In File Explorer, open
C:\Program Files\Cloudbase Solutions\Cloudbase-Init\conf, select theUnattendfile, and click «Copy» on the ribbon. File Explorer hides the extension: this is theUnattend.xmlfile.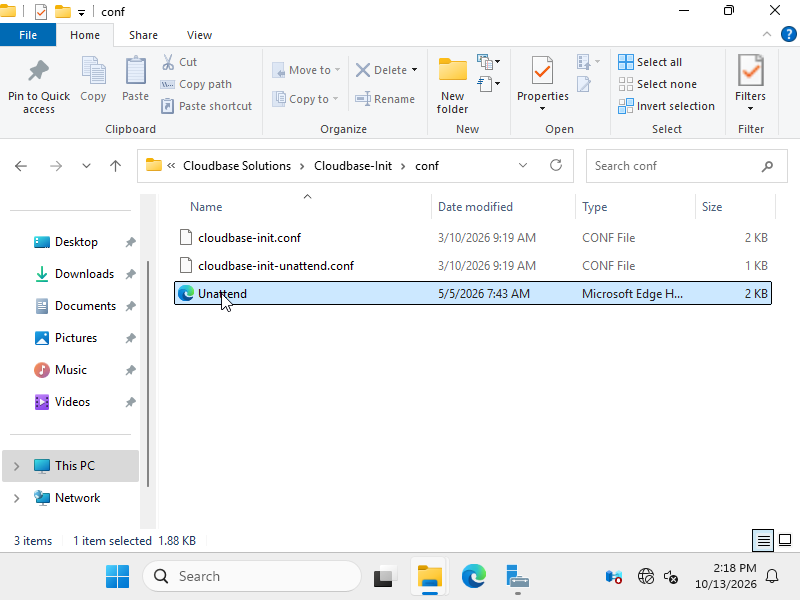
Open
C:\and click «Paste».Unattendappears in the root of the drive.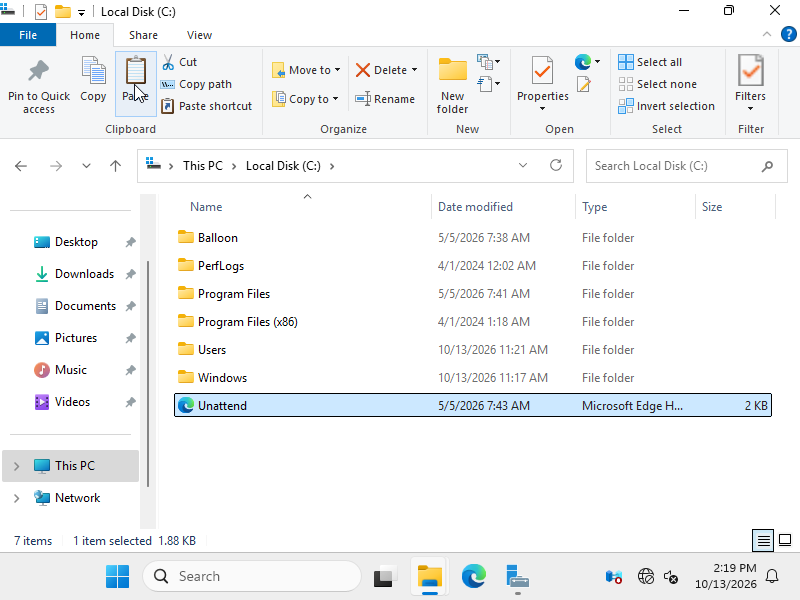
-
Run sysprep. Press Win+R, paste the whole line into the «Run» window, and click «OK»:
C:\Windows\System32\Sysprep\sysprep.exe /generalize /oobe /quit /unattend:C:\Unattend.xml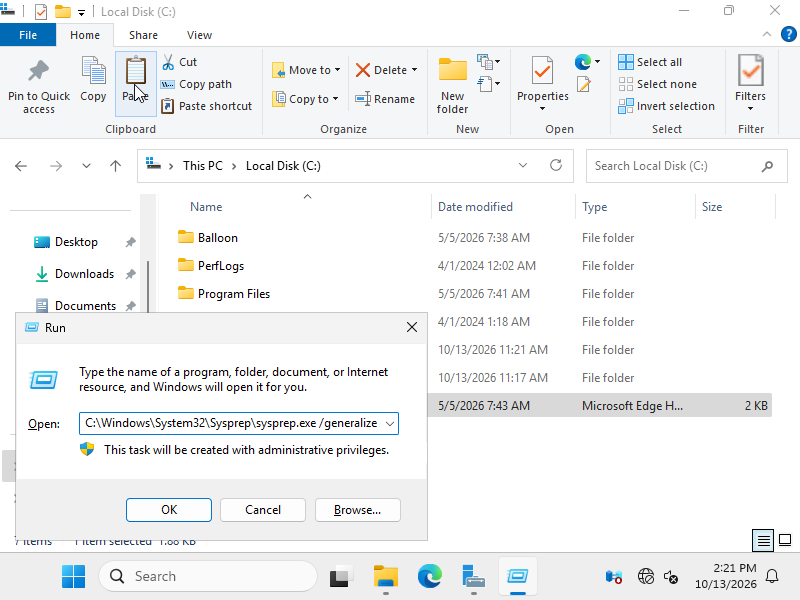
The sysprep utility's own window does not fit: it cannot take an answer file, and without one the copies stop at the first-run wizard screens.
The
/quitswitch matters too. With/shutdown, Windows powers itself off, but vStack Center considers such a VM running and may power it on again. Windows then starts setup right on the source machine, and the generalization is lost.The «Sysprep is working…» window appears. Wait for it to close — usually a few minutes.
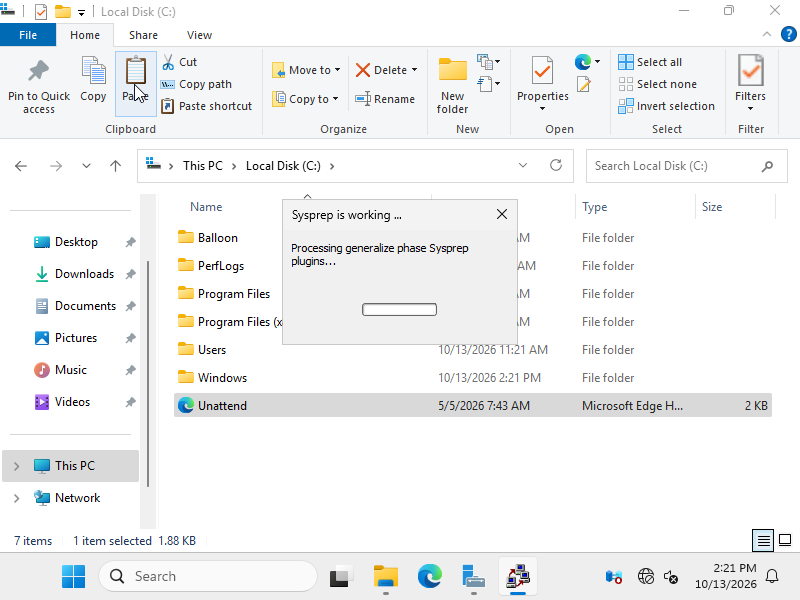
Check the result: the
Sysprep_succeeded.tagfile with the current time must appear inC:\Windows\System32\Sysprep.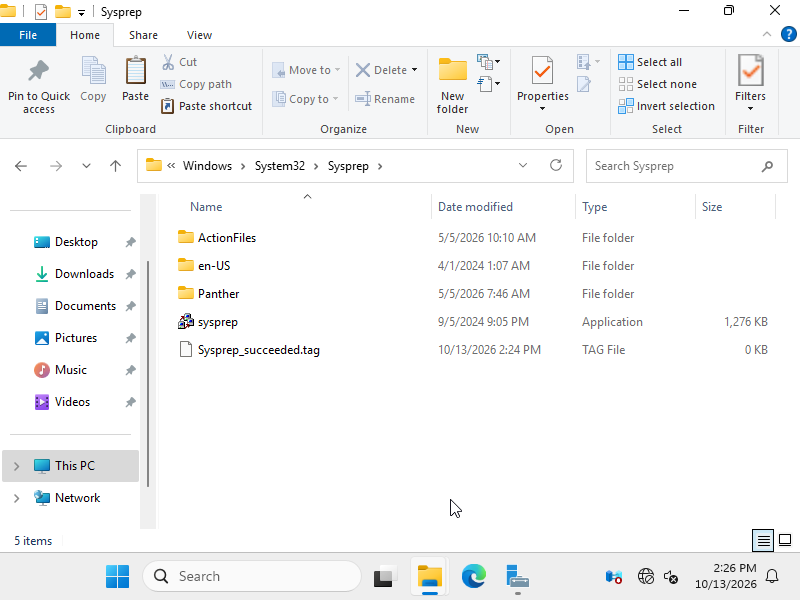
-
Stop the VM from vStack Center: on the VM card, «Actions» → «Stop». Do not shut down or restart the machine from inside the guest. Wait for the «Offline» status.
-
Do not start the VM before conversion. Any boot starts setup on the source machine. If that happens, stop the VM, roll it back to the snapshot from step 2, start it, and repeat steps 3–7.
-
Convert the VM into an image following How to convert a VM to an image.
Verify the result
Create a new VM from the image and open its console.
| What to check | Expected |
|---|---|
| First boot | Windows goes through setup and restarts by itself — usually twice |
| Boot outcome | the sign-in screen with no errors and no first-run wizard |
Troubleshooting
| Symptom | Cause | What to do |
|---|---|---|
| the copy reboots in a loop with «The computer restarted unexpectedly…» | the Cloudbase-Init service was on automatic start during sysprep | the image is unusable: do not create VMs from it and prepare a new source VM, checking steps 3 and 4. For removing the image, see The image cannot be removed |
| the copy stops at the first-run wizard screens | sysprep was run without the Cloudbase-Init answer file | the image is unusable: prepare a new source VM and run sysprep with the line from step 6 |
| the source VM booted after sysprep | shutdown from inside the guest or a manual start | stop the VM, roll back to the snapshot, start it, and repeat steps 3–7 |
| sysprep ended with an error | the cause is written to C:\Windows\System32\Sysprep\Panther\setuperr.log | fix the cause, roll back to the snapshot, start the VM, and retry |
See also
- How to convert a VM to an image.
- How to prepare a Linux VM for conversion to an image.
- How to take VM snapshots and roll back to them.
- OS image library.
API methods
The API operations covered on this page are vms-snapshot, vms-rollback,
vms-stop, os-image-from-vm, and vms-create; see the
API reference.